stellarHD#
Introduction#
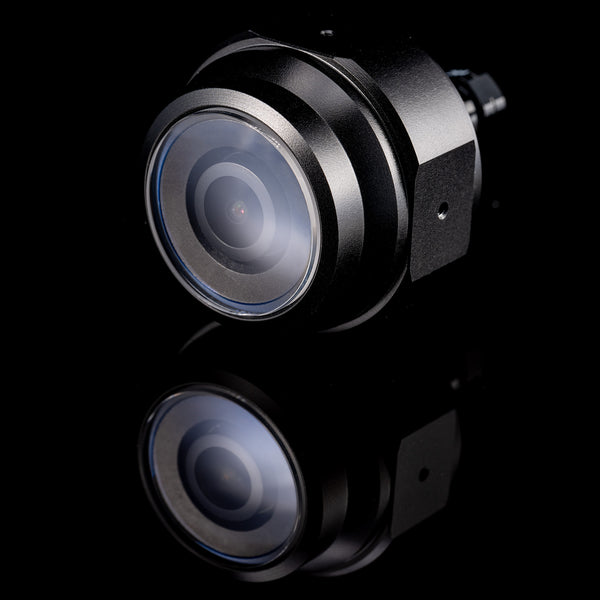
Introducing the world’s first patent-pending UVC camera that boasts a 2MP HD Global Shutter sensor all through a USB output while featuring external Frame-Sync capability with microsecond accuracy. All of these features in a familiar easy-to-use package with an impressive 900 meter water-depth rating.
Technical Specifications#
Water-Resistance Specifications
Water-Resistance Depth Rating: 1000 meters
Ingress Protection Rating: IP69K+
Cable Diameter: 4mm OD
Color Sensor Specifications
Image Sensor: 1/2.9” Omnivision OmniPixel 3-GS™ CMOS
Sensor Type: Global Shutter
Max Resolution: 1600x1200
Max Framerate: 60fps
Format: MJPEG, YUY2
Color Depth Per Channel: 8 bits per channel (24 bits total)
Connection: USB2.0 High Speed
Voltage: 5V
Current: 500mA
Wattage: <2.5W
Monochrome Sensor Specifications
Image Sensor: 1/2.9” Omnivision OmniPixel 3-GS™ CMOS
Sensor Type: Global Shutter
Max Resolution: 1600x1200
Max Framerate: 60fps
Format: MJPEG, YUY2
Color Depth Per Channel: 8 bits per channel (16 bits total)
Connection: USB2.0 High Speed
Voltage: 5V
Current: 500mA
Wattage: <2.5W
Standard Lens Specifications
Type: Fisheye
Lens Aperture: f/1.9
View Angle: 150 Degrees Diagonal (in water)
Minimum Focus Distance: 20-30 cm
Note: Alternative Lenses Available Upon Request
Instructions for Wiring USB
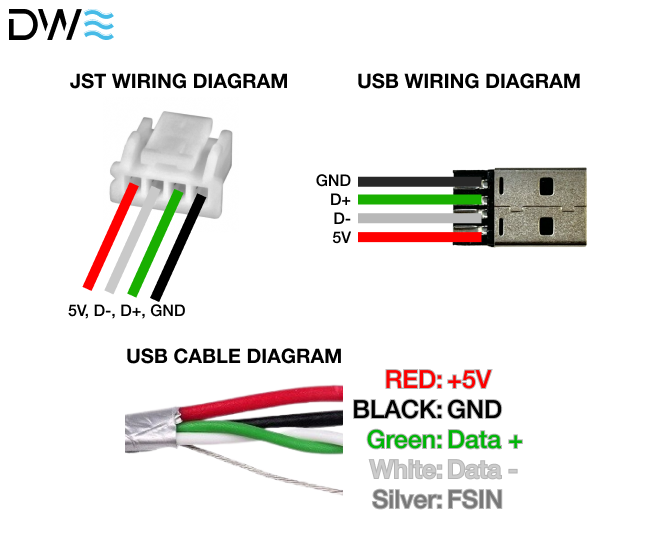
Instructions for Wiring Frame-Sync Pin (FSIN)
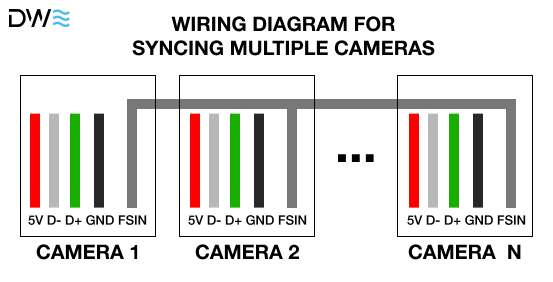
Instructions for Frame-Syncing In Code
Install the following packages on linux:
sudo apt install libx264-dev libjpeg-dev

sudo apt install -y libglib2.0-dev libgstreamer1.0-dev libgstreamer-plugins-base1.0-dev gstreamer1.0-tools gstreamer1.0-x gstreamer1.0-plugins-base gstreamer1.0-plugins-good gstreamer1.0-plugins-bad gstreamer1.0-libav libgstreamer-plugins-bad1.0-dev gstreamer1.0-plugins-ugly gstreamer1.0-gl

sudo apt install -y v4l-utils
Run the following command to list your current camera devices:
v4l2-ctl --list-devices
Find the device ID of the two cameras you would like to utilize, and then choose a device ID number that is not listed. We will use this unused device ID for the virtual device we are going to create.
We now want to create a virtual device for two stitched videos. Here we are calling the virtual device “stellarHD_stitched” and the video ID number (video_nr) we chose is 9, as the number 9 is not being used by any active device.
sudo modprobe v4l2loopback video_nr=9 card_label=stellarHD_stitched exclusive_caps=1
Then you can launch the gstreamer pipeline that will create the stitched video, and output the video stream to the virtual device we created.
gst-launch-1.0 -v \
compositor name=mix \
    sink_0::xpos=0    sink_0::ypos=0   sink_0::alpha=1 \
    sink_1::xpos=1600 sink_1::ypos=0   sink_1::alpha=1 \
! jpegenc ! jpegdec ! videoconvert ! v4l2sink device=/dev/video9 \
v4l2src device=/dev/video0 ! image/jpeg,width=1600,framerate=60/1 ! jpegdec ! mix.sink_0 \
v4l2src device=/dev/video2 ! image/jpeg,width=1600,framerate=60/1 ! jpegdec ! mix.sink_1
Then you can follow our sample code here to use /dev/video9 in OpenCV.
To remove the loopback device, you can either restart your device. Or use the following commands to manually remove the loopback device:
First retrieve any programs still using the loopback device:
sudo lsof /dev/video*
Then use the PID (Process ID) number(s) and kill the processes:
sudo kill INSERT_PID_NUMBER
Then remove the loopback device:
sudo modprobe -r v4l2loopback